The secret for selling your images.
Depending on your age you might remember the old(?) TV commercials - it was ALL about the product, how great it is, how useful, better then the competition! & so on.
These days you sometimes have to wonder just WHAT the heck are they trying to sell you?...
The difference is all about you, literally speaking, it's all about having you FEEL something, making you laugh or identify with, cry or get angry/scared - all depending on what is being offered.
This is because YOU have changed, the client is much more sophisticated now, has access to more info/products/reviews.
Here is a great example of beautiful story telling...you might not even realize you are watching a commercial until the very end...It's not in English but you won't care, you can be immersed in the story if you like going to the movies...you caused the seller to go all out & create a movie for YOU! (click on the white link "Unsung Hero (official HD) in the video, it will open another window where you can read the English subtitles better (uncovered) -
I loved watching this little mini movie but what can we take from this to use with our own clients?
Respect them, be willing to go all out & deliver more then you promised (we all heard of under promise & over deliver), create marketing tools that make your potential client FEEL something, engage their interest with creative materials - followed by a "call to action" (i.e. Click here, Buy now, get it at xx% less, etc).
Listen to what THEY want & give them that, it's not all about how great of a photographer (or xyz) you are, it's about what's in it for them.
But most important - have fun with it!
Do you have any marketing tips? Feel free to share them here :)
Monday, July 21, 2014
Saturday, July 12, 2014

The light you see glowing from the box is another one of those tiny flashes with an orange gel - secret tip - I stuck my phone inside the box as well, playing one of her favorite videos...how on earth did photographers (& parents) cope without wifi & YouTube?
This time I used text on top of the images in the slideshow instead of text cards - what do you think works better?
The images were captured using a Canon 5DII & a 24-105 F4 lens (one of my favorites!)
Lighting- Dynalite 1000w power pack & two heads (large Octadome modifier on main head).
Would love to answer any questions you may have & as usual, I welcome your comments!
Wednesday, July 2, 2014
 There is an old saying in Yiddish "man trachts un got luchts" which means Man plans & God laughs...
I had an idea. It looked great in my had.
Have you ever had a great idea but it didn't quite happen according to plan?
Well, It's not that it didn't go according to my plan rather the results took me in another direction all together.
See, I wanted to create a scene that's reminiscent of an old "antiquie" study...dimly lit, old books...
(what exactly would a six months old baby be doing in the middle of it all didn't bother me at the time...), the result was to be a nice printed stately portrait.
But when I downloaded the images & looked at the stuff on the computer I couldn't stop smiling - baby girl (looks like a boy here) had the most express-full face, along with body gestures to match!
I couldn't pick just one, plus it didn't have the look I wanted anyways (read what went wrong below) but I had to do SOMETHING with it.
As I continued to look, a story was unfolding in my mind...what if..she was left alone at the wizard's den...& got into trouble touching something she wasn't supposed to touch? - that IS what babies do :)
I happened to be testing out a slideshow making software so I decided to plug it into a timeline & see what happens - this is the result: (watch with sound on if you can!)
What went wrong -
- PJs needed to be different, darker in color & different in style to really blend into a stately portrait.
- She was at an age where it's not so easy to sit still especially when there are cool looking "things" all around you want to play with (search & destroy).
- My back light was too bright but it was difficult to reach with all the props I had in the way so after a few tries with diffusion paper I gave it a rest - I should have moved everything a few feet forward...next time :)
- Some would argue I had too many props...
Here are a few BTS images:


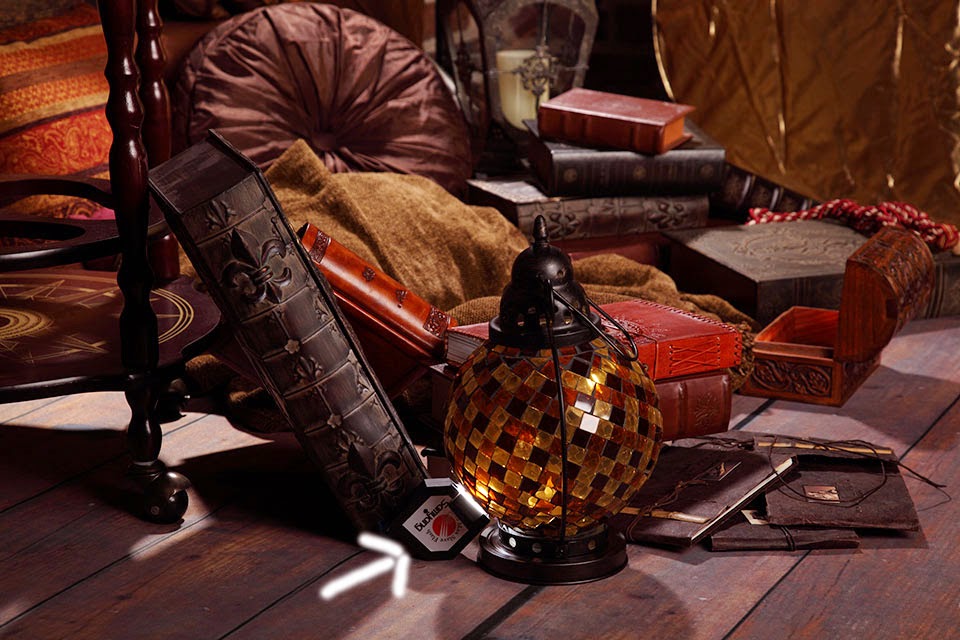 Tech tip - to make the two lanterns glow, I put a mini slave (battery operated flesh) behind each one & covered it with a piece of orange gel (two layers), the only down side is the recycle time is not great even with fresh batteries (about 2 sec) so I had a bunch of shots where the flashes didn't fire.
 I get a giggle each time I play it so I'm pretty happy my serious idea didn't pan out as expected :) Instead of a framed print I'm going to make a few mini accordion books & gift the grand parents...
Wishing all of you a good happy laugh each & every day!
Saturday, December 7, 2013

Create your very own magical snow globe!
Insert an image under the snow globe layer and chose if you want it "snowing" or not by clicking the eye icon next to the snow layer.
You can customize the text layer and add more of your own. (Must have basic working knowledge in PhotoShop).


Download snow-globe card
Feel free to use the card to send to friends, family, loved ones (hope you have many!), clients, etc, I just ask you to not sell it as a blank template due to copy writes protection :)
Have fun and happy holidays!
Friday, November 22, 2013

You may have noticed I was "away" for a while...hopefully you missed me as well :)
I have definitely missed creating new blog posts & sharing them with you...
One of the more important reasons I was so quiet (besides keeping busy with photo assignments) was being pregnant & now the proud mother of a six months old beautiful baby girl :)
No one told me that one of the things time does when you have a baby is take quantum leaps instead of the regular 24/7...for example, I meant to take little baby pictures of her & only got around to doing it now(!). Moving to a new house & having everything in boxes didn't help either but I finally dug out a basic light setup & did a little test.
I set up shop in the basement (great high ceiling & windows) & did this around midnight when the little peanut refused to go to sleep & was seeking creative entertainment...I love having an in house model! Just like the big fashion houses ;)
This is a simple setup you can do anywhere (almost), I used a painted backdrop from Denny but you can use a solid color, brick wall or anything else you see fit.
The light setup consists of a main light, a hair/back light & a reflector.
I used two Dynalite heads (my favorite light packs!), the main light has a five foot octagon soft box with grid (Photoflex).
The hair/back light also has a honeycomb grid on (#20) to control light spill, it is mounted on a boom arm..
On the opposite side of the main light you have a simple round silver reflector ( Westcott).
I used the teddy bear as a stand in for the youngster since he has way more patient & spent a little time adjusting the lights, I could have done some finer tuning but hubby/assistant was getting restless...hey, I can't get too picky at that time of night, lol!
Here are the stages of directing the lights where you want them to go:
First you want the main light to illuminate your subject & spill onto the background (since I didn't use a dedicated back light).


The reflector is filling the other side of the subject but the intensity will be determined by you - move it closer for a brighter look or further away for a soft fill of the shadows - I have them about equally distanced from my teddy.

If you are familiar with my work, you know I like to use many more lights when I shoot, being a control freak pays off but since I wanted something simple, quick & easy this setup worked just fine.
Here are a few un-edited takes:
cutie pie photo shoot
The entire actual shoot lasted less then 10 min & that includes having the puppy girl topple backwards & trying to eat the floor (roll up from Denny) but it was a lot of fun & I can't wait to do it again!
After picking out a few of my favorites (sooo hard since I love them all) I headed to Photoshop to do some creative "dodge & burn" & have some fun, I love the look & feel of old photos...so I was playing around with different textures & colors, this can literally take forever since the options are endless & at some point I just have to be happy with the result & just let it be :)
Here are a few of my edited images:


You can use this basic, simple light setup to shoot pretty much anything you like - still life, people, pets, self portraits, etc.
Outside, on location the sun can be your back light (or main light), then use an on/off camera flash to be your second light (either the main or fill light) & of course remember to set up that reflector :)
Would love to hear from you so let me know what you think & definitely share your work with us here!
Happy to be back!
Monday, December 3, 2012

Holiday gift for you!
First, I want to apologize for not posting in quite a
while... I hope all of you are well and that you had a good year or at least
learned some good lessons you can take with you into 2013...
As many of you may remember I like to give a little gift at
the end of the year just to say thank you for choosing to spend some of your
time here with me on the blog and for the many interesting emails and
comments you share :)
A number of people mentioned they would love to have the
card templates I made and I'm happy to oblige!
Since the holidays are here, I made a few special cards just for you!
It's my way of saying thank you for your support :) ( so if you haven't done so yet - enter your name and email address in the "Subscribe now!" field (top right))
The cards are 5x7 at 300 ppi (created using Photo Shop CS - any recent PS version can handle it).
There are a few templates and a background paper in each set to create single, double or even triple fold cards!
They are composed of a few layers that give you a lot of flexibility in customizing them to your specific needs - flip them around, add "Happy Holiday", "Mazal Tov", "We Love Grandma" or anything else you fancy, re-size them and play around - but the most important thing is to insert pictures into the frame and put them to good use!
To use them as is( in Photo Shop), just drop an image into the empty layer, re-size it as needed and print or email.
The cards are yours to keep, use them, share them and sell them to your clients with your/their images :)
The only thing I ask that you avoid is resell them as blank templates due to artist rights.
So go ahead, enjoy your cards and let me know how you liked them :)
(Click image for larger view/click on set_number to download a zipped bundle/save as )
Set#1 set_1

Set#2 set_2

Set#3 set_3

Set#4 set_4

Set#5 set_5

Set#6 set_6

(Photos are not included and are for demo purposes only@vered koshlano)
Saturday, March 3, 2012
Canon 5D III
 As you well know by now, Canon has announced the highly anticipated 5D mark 3 (5DIII).
Canon engineers did their best to address all the "issues" customers wanted fixed/added and redesigned the camera delivering better ergonomic functionality along with extra features that didn't exist before.
I had a short hands-on with the 5D3 a few days ago and have to say I was impressed; the buttons make more sense, the improved AF (61 points) takes focusing to a completely new level, a full frame 22.3 CMOS imager coupled with the powerful Digic 5+ processor deliver speed, low light capabilities, new video features like 60p @720, improved overall performance...and much more :)
Here is a link to the Canon 5D3 page, it lists all the features and specs you would love to have on this full size sensor camera: Canon 5DIII specs
I also found a great article on Cnet with a nice compare chart you might want to check out: Canon 5DIII on Cnet
I'll post images here as soon as I have a chance to shoot with it :)
Subscribe to:
Posts (Atom)